Voice Memos is a handy app for recording quick notes, interviews, lectures, or any audio you need to capture on the go. However, as time passes, your iPad can become cluttered with numerous recordings, many of which you might no longer need.
Permanently deleting these voice memos can help free up storage space and keep your device organized. While deleting a voice memo from the app might seem straightforward, ensuring it’s permanently removed from your iPad and not just sent to the “Recently Deleted” folder requires a few extra steps.
This guide will walk you through the detailed process of permanently deleting voice memos from your iPad.
Watch: How To Find Recycle Bin On iPad
Permanently Delete Voice Memos On iPad
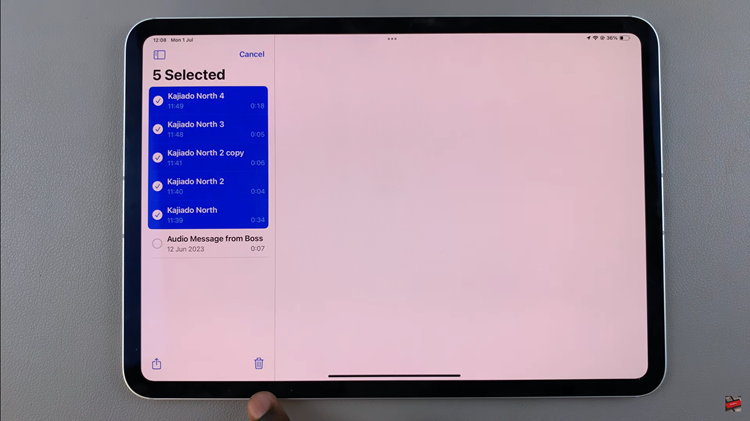
Begin by launching the Voice Memos app on your iPad. Then, look for the “Edit” button located at the top of the screen. Tap on this button to enter editing mode. Select the voice memos you wish to delete by tapping on them. After making your selections, tap on the “Bin” icon to remove these memos from the main list.
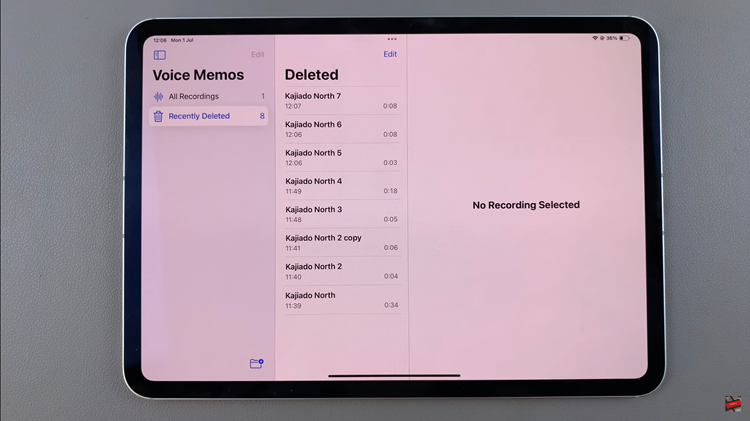
When you delete a voice memo from the main list, it is moved to the “Recently Deleted” folder. To access this folder, tap on the “Side Panel” icon at the top left corner of the screen. From this menu, tap on “Recently Deleted” to view the memos you have removed from the main list.
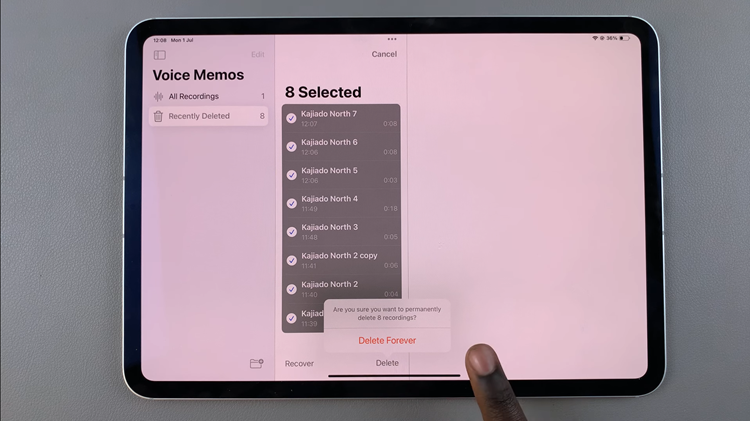
In the “Recently Deleted” folder, tap on the “Edit” button again. At this point, select the memos you want to delete permanently by tapping on each one. Once you have selected the memos, tap on the “Delete” button. Confirm your action by selecting “Delete Forever.”
By following these steps, you can effectively delete voice memos from your iPad, ensuring they are removed permanently from both the device and iCloud if synced.

 On Sony WH-1000XM6")