The Final Cut Camera app is a versatile and powerful tool for anyone looking to capture high-quality video content.
Whether you are a novice filmmaker, a vlogger, or just someone who loves creating videos, understanding how to use this app effectively can elevate your projects.
This comprehensive guide will take you through everything you need to know to get started and make the most of the Final Cut Camera app.
Watch: OnePlus Watch 2: How To Change Screen Timeout Period | Change Screen Auto Lock Period
Use Final Cut Camera App – Everything You Need To Know
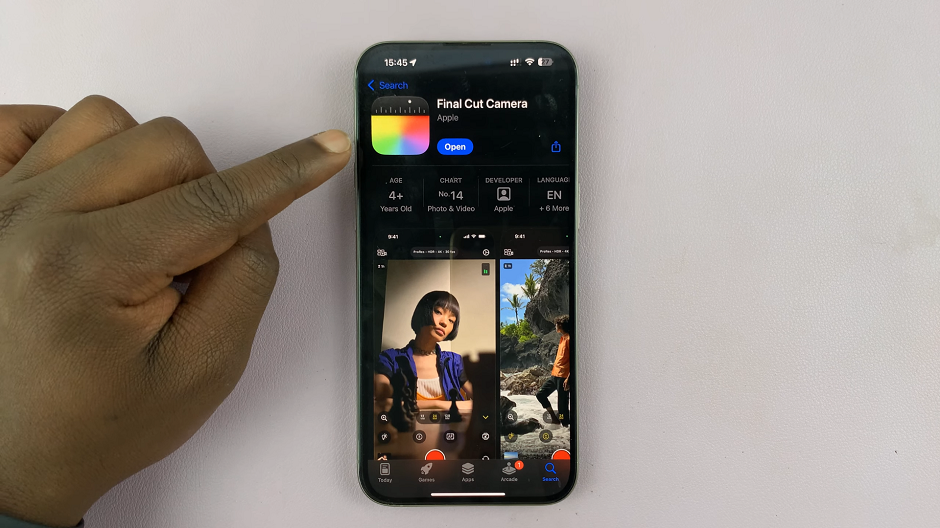
The Final Cut Camera App is a standalone app by Apple, separate from the camera app on your iPhone. A simple search in your Apple’s App Store will ensure you can download and install it on your iPhone, for free, if you’re running at least iOS 17.4 or older.
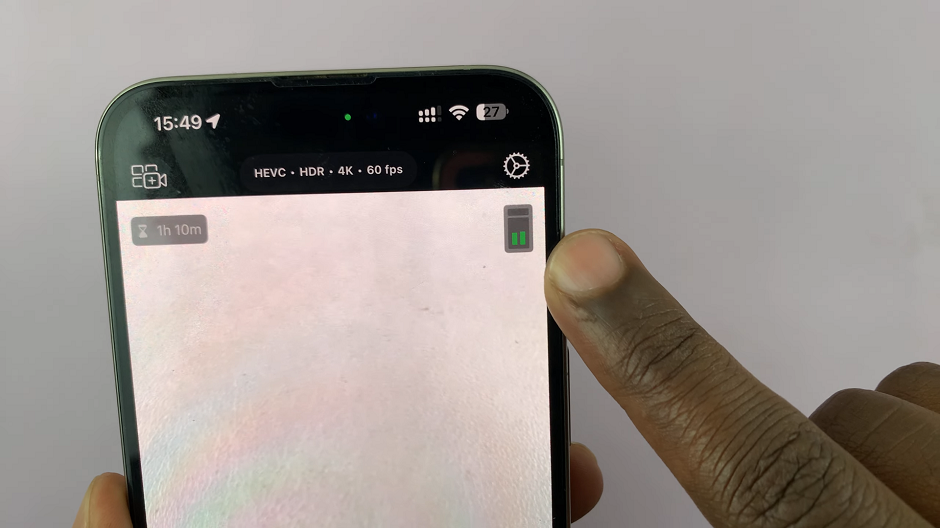
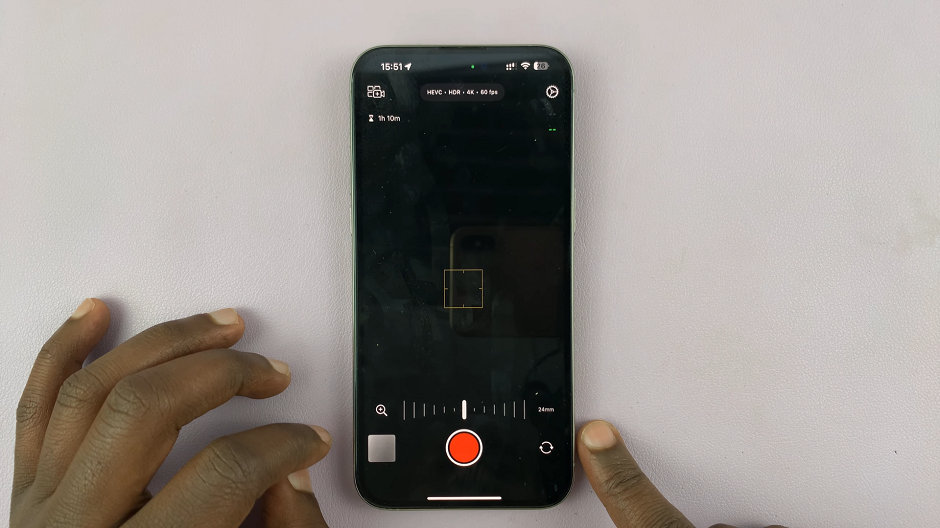
Upon installation, open the app and give the necessary permissions to start using it. You will need to give Microphone, Camera and Location permissions. The interface will have a couple of functions:
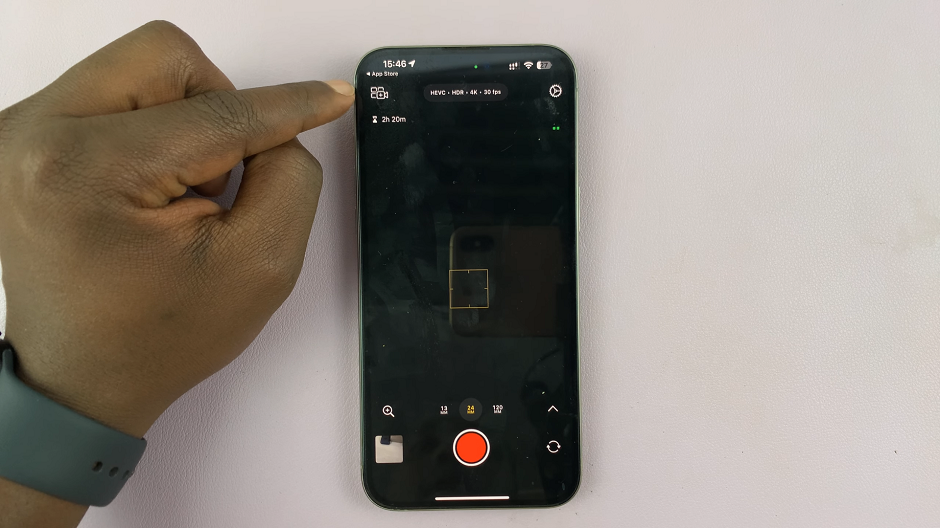
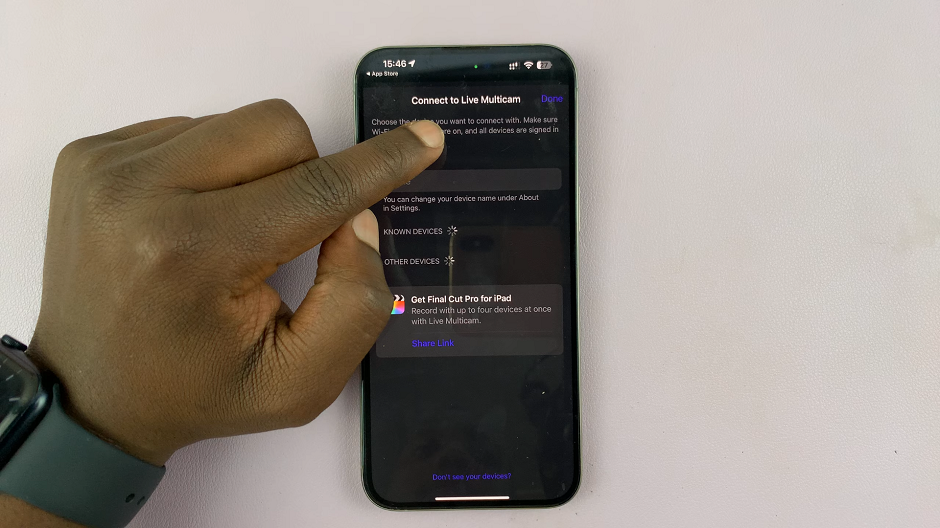
In the top-left corner, there’s an icon that represents the Connect to Live MultiCam function. It allows you to connect to other devices.
Just below the Connect to Live MultiCam function, is the time in hours and minutes. The duration available to you is dependent on the settings you choose in the top-centre of the screen.
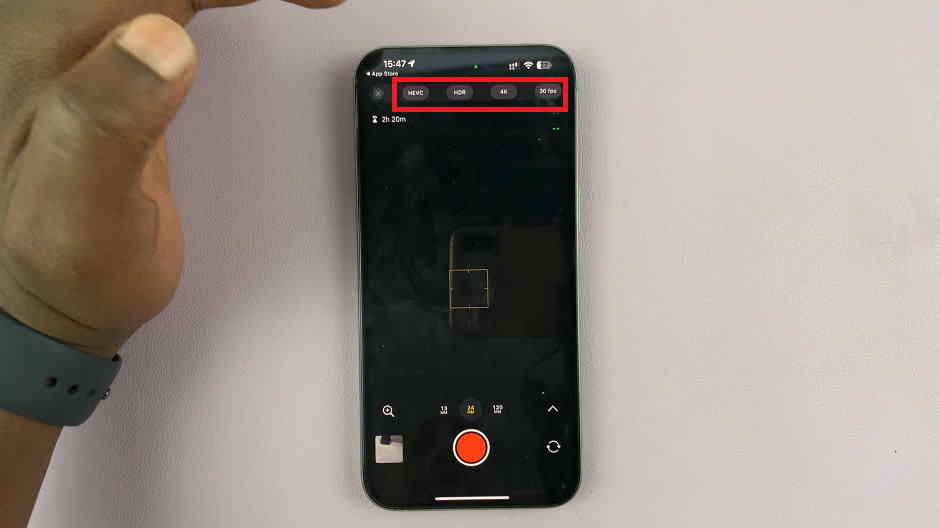
These settings are quick settings for the CODEC (HEVC – H.265 & Apple ProRes), HDR (SDR or HDR), Video Resolution (e.g., 720p, 1080p, 4K) and Frame Rate (e.g., 24fps, 25fps (PAL), 30fps, 60fps). Higher resolutions and frame rates result in better quality but consume more storage space. Therefore, the duration is considerably less.
Adjacent to the duration, on the opposite side is the sound monitor that allows you to know whether the microphone level needs adjustment.
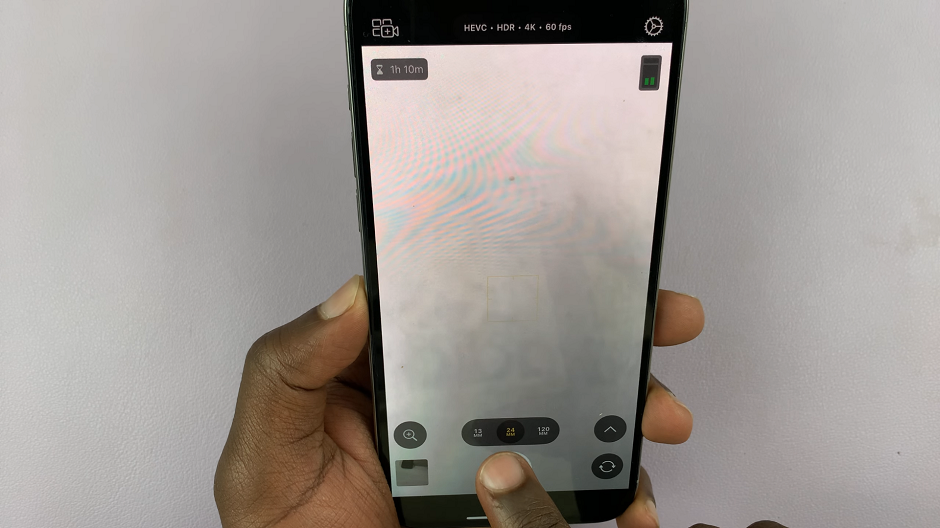
In the mid-bottom section, are the lenses. These will depend on the number of lenses your iPhone has. You can switch between the lenses that are available to you. Contrary to a regular camera app, once you choose a lens, it will not be changed when you perform any actions like zooming in or out. The lens chosen maintains, until it is changed manually.
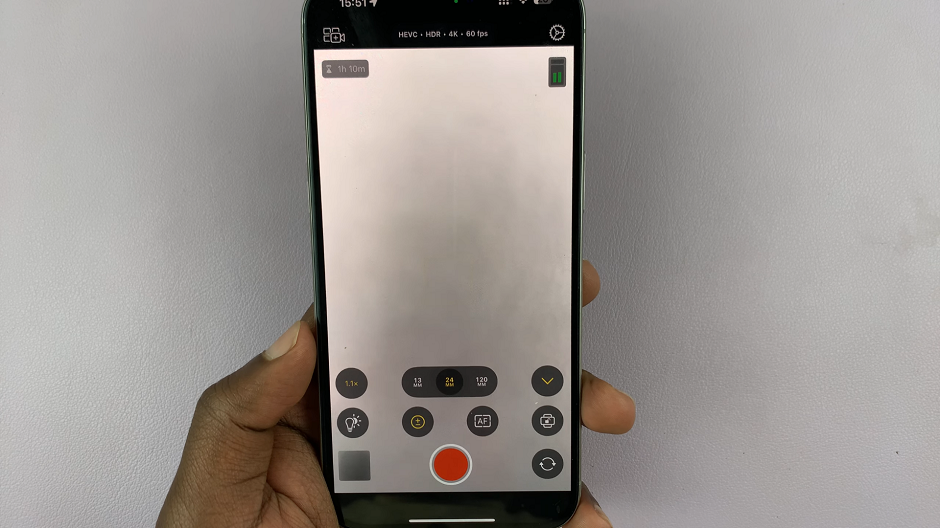
In the bottom-right corner, you have the circular looped arrows to switch between the front and back cameras. Next to it is the red record button which you tap to start and stop recording.
Final Cut Camera More Options
To the left of the record button, is the Final Cut Camera Gallery, which is independent of your iPhone’s camera roll or gallery.
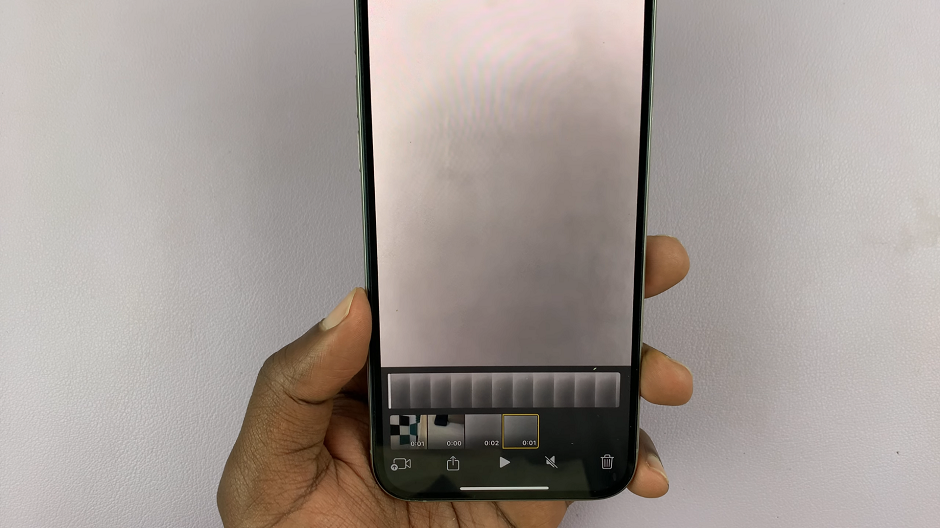
Here, you can delete footage, mute it, share it or seamlessly import footage into Final Cut Pro for editing. This allows for more advanced editing techniques, color grading, and special effects.
Just above the Gallery thumbnail, is the Zoom button. Once you tap on it, the Zoom Slider appears. This will help you adjust the zoom level smoothly, according to the lens you chose.
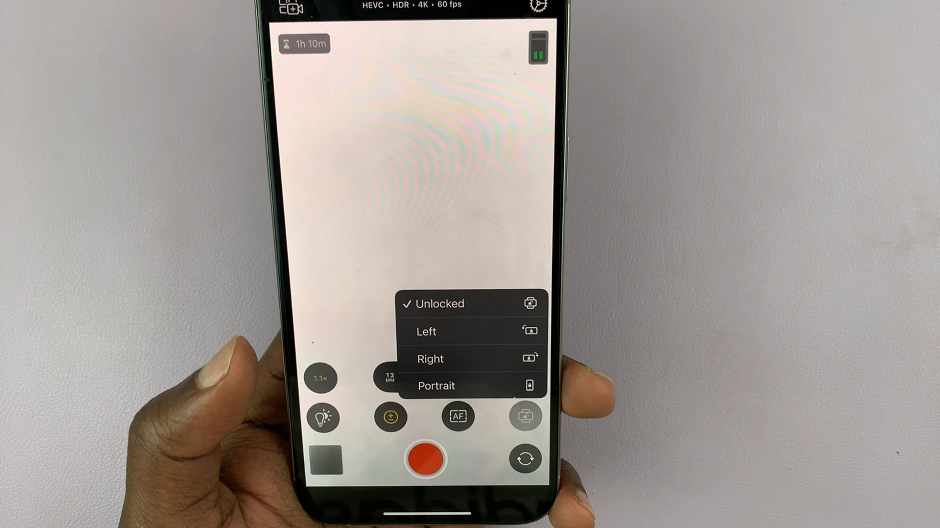
To the right of the lenses option, there is an arrow that reveals a couple of more options when you tap on it. You can adjust the White Balance, Focus, Exposure and Orientation (Unlocked, Right, Left or Portrait).
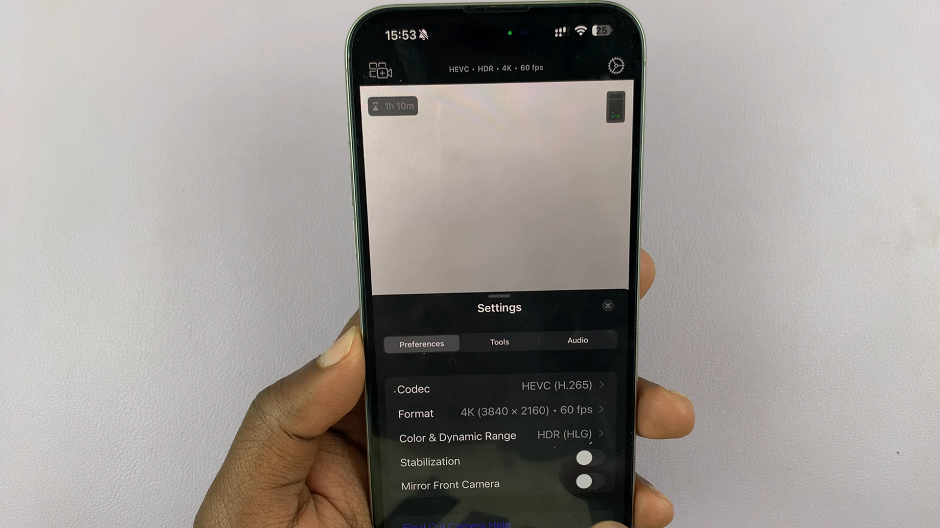
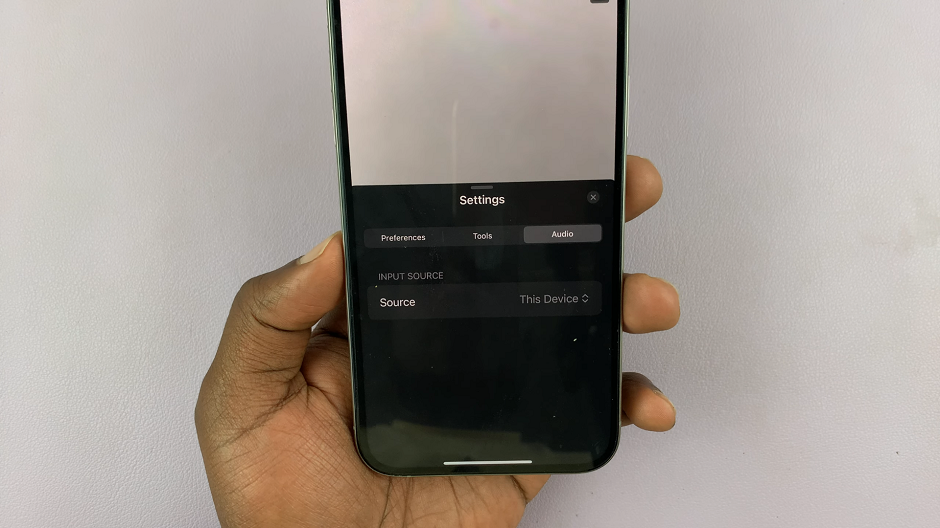
Finally, in the top-most left corner of the interface, is the Settings icon. It is represented by a gear wheel icon, as is common. Once you tap on it, you will be presented with three tabs:
Preferences: this tab houses the aforementioned shortcuts that are available in the top-centre of the screen. These include CODEC, Format and Color & Dynamic Range. in addition, there are toggles for Stabilization and Mirror Front Camera, which you can enable or disable based on preference.
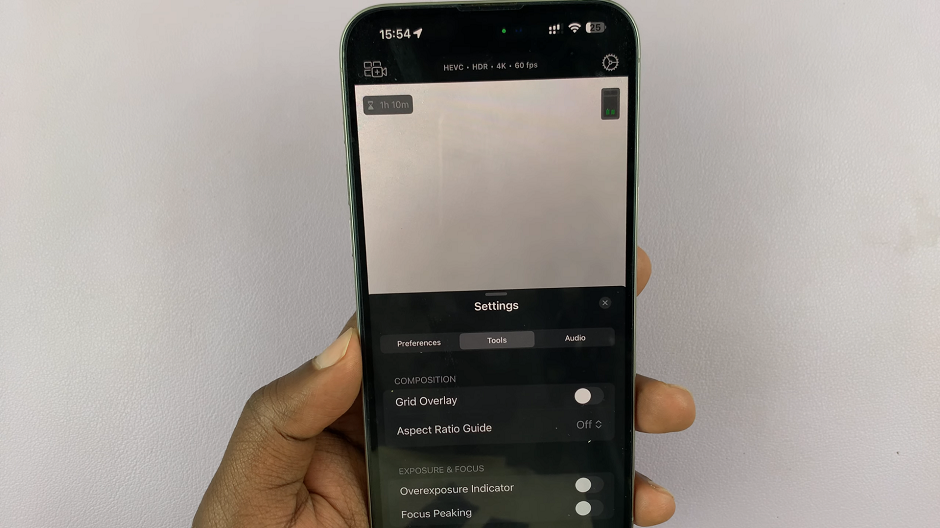
Tools: Here, you can enable or disable Grid Overlay and the Aspect ratio Guide, Overexposure Indicator and Focus Picking.
Audio: Allows you to choose the source of your audio. Good audio is crucial for any video. The Final Cut Camera app allows you to adjust microphone sensitivity to ensure clear audio capture. It also offers external microphone support, which provides professional-quality sound.
Tips for Capturing High-Quality Footage
Lighting: Proper lighting can make a significant difference. Ensure your subject is well-lit, and avoid harsh shadows. Natural light is often the best option.
Stability: Use a tripod or stabilize your device to avoid shaky footage. Many smartphones also have built-in stabilization features—make sure they are enabled.
Composition: Follow the rule of thirds to create visually appealing shots. Place your subject along the gridlines or at their intersections for balanced composition.
Troubleshooting Common Issues
Storage Problems: High-quality video files can consume a lot of storage space. Regularly back up your footage to a cloud service or external storage device.
App Crashes: Ensure you have the latest version of the app installed. If issues persist, try restarting your device or reinstalling the app.
Poor Audio Quality: Check your microphone settings and ensure it is not obstructed. Using an external microphone can greatly improve audio quality.
The Final Cut Camera app is a powerful tool that, when used correctly, can significantly enhance your video production capabilities. By understanding its features and applying the tips and techniques outlined in this guide, you’ll be well on your way to creating professional-quality videos.

