Connecting a wireless mouse to your laptop can significantly add to your comfort, increase your productivity, and enhance your overall computing experience. Whether you are working from home, taking online courses, or just looking to avoid the frustration of dealing with tangled wires, a wireless mouse offers both freedom of movement and convenience.
But for first-time users of wireless accessories or those changing from a wired mouse, setting up your device may appear overwhelming. In this guide, we’ll walk you through the exact steps involved in pairing a wireless mouse to a laptop using either Bluetooth or a USB receiver.
It covers a wide range of operating systems, from Windows 10, Windows 11, to macOS, along with Chromebooks, and also has compatibility with top-tier brands of mouse like Logitech, HP, Dell, and Microsoft.
Watch: How To See Which Apps Have Access To Your Location On Windows PC
Connect Wireless Mouse To Laptop
Beforehand, ensure that you have enough power on your Bluetooth mouse. If it’s low on power, simply plug in your mouse into a power source.
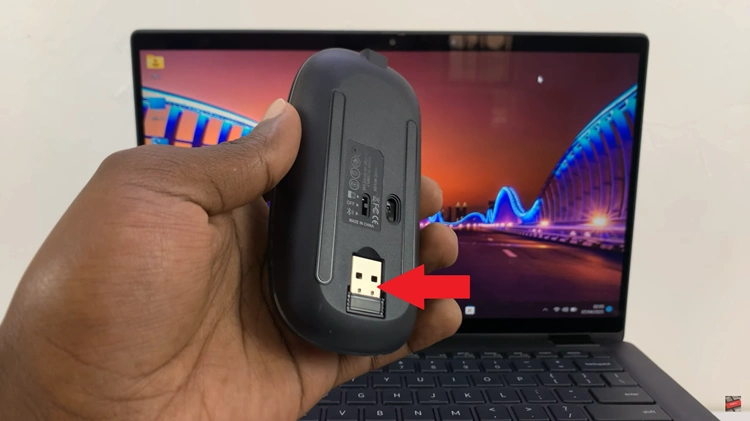
Following this, you’ll notice a receiver on the mouse that you’ll use to connect wirelessly with your laptop. Simply remove the receiver (Bluetooth dongle) and plug it into any USB port on your laptop.
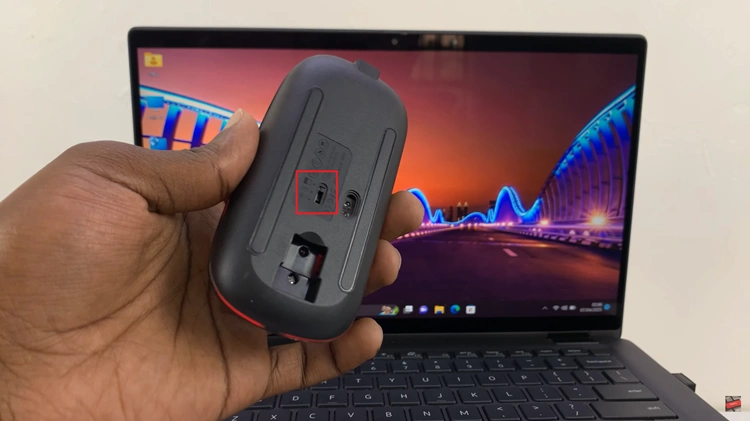
Once plugged in, your mouse should begin to work. However, if that’s not the case, ensure that you’ve turned on your mouse. You’ll notice a switch at the back of your mouse. Simply, turn on the switch to the ON option to power on your mouse.
In conclusion, connecting a wireless mouse to a laptop is simple, whether you have a USB receiver or a Bluetooth mouse. By following the steps above, you can learn how to connect and use your wireless mouse on your laptop.
Read: How To Add Wireless Debugging Shortcut To Quick Settings Panel On Samsung Galaxy A36/A26/A56

