Nintendo Switch 2 provides better cloud integration and media management features, including automatic uploads for saved data and gaming videos. Although this feature is convenient to back up your data, it can also use bandwidth or cloud storage quickly if not managed properly.
Whether you want to turn on this setting for easy synchronization or off-off to preserve data, it is necessary to know how to control automatic upload on the Nintendo switch. In this guide, you’ll learn how to enable & disable automatic uploads on your Nintendo Switch 2.
Whether you’re looking to free up space, reduce data usage, or ensure every moment of your gameplay is safely backed up, this guide has you covered.
Watch: Enable High Contrast Mode On Nintendo Switch 2
Enable & Disable Automatic Uploads On Nintendo Switch 2
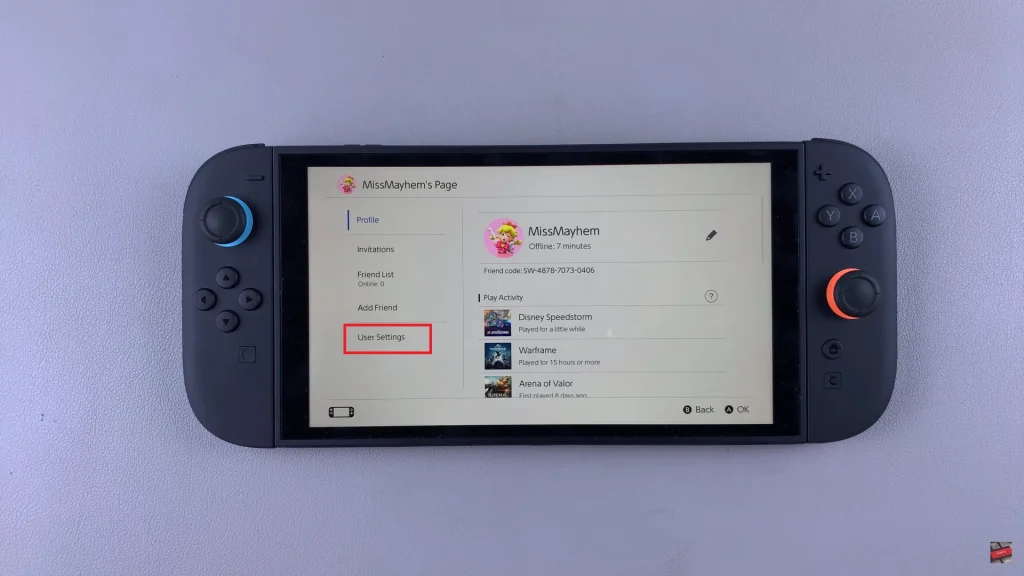
Begin by accessing the home screen on your Nintendo Switch 2. From here, tap on your profile icon located in the top left corner of the screen. Then, tap on ‘User Settings‘ from the options that appear.
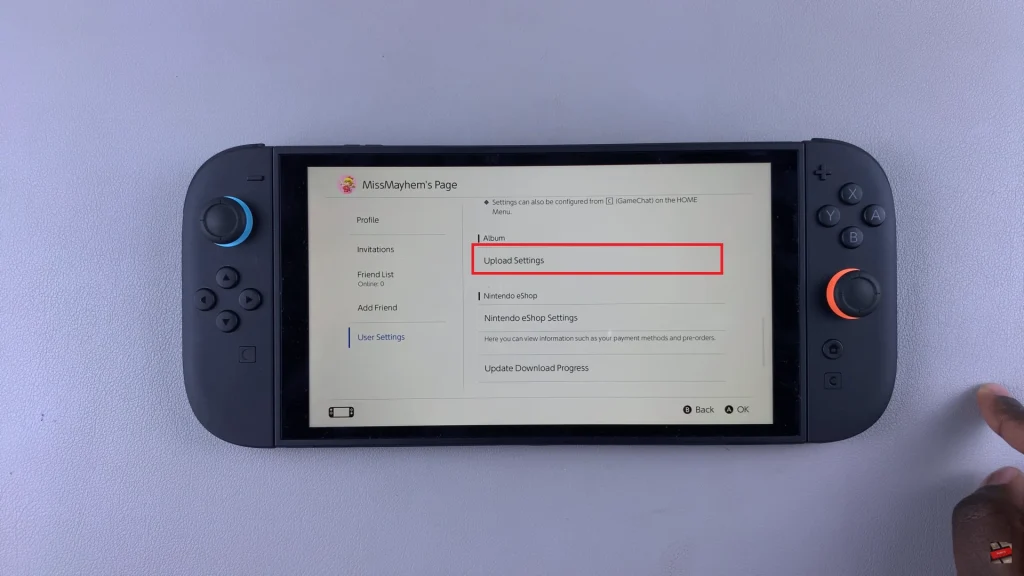
Following this, scroll down until you find ‘Upload Settings’ within the user settings. Tap on it to proceed to the next step.
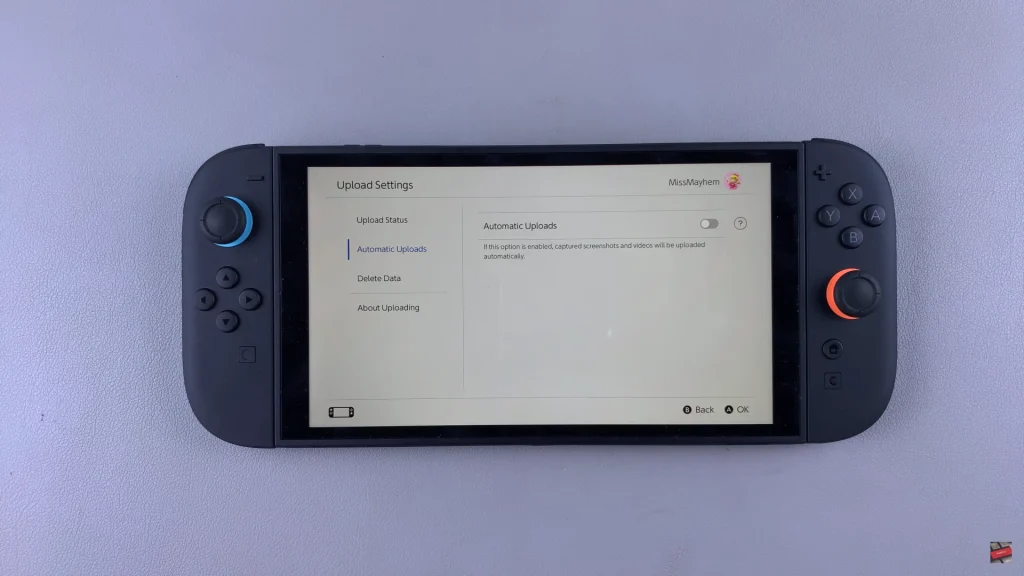
At this point, tap on ‘Automatic Uploads‘ in the left side menu. You’ll see a toggle switch next to Automatic Uploads option. To turn on or off this feature, tap on the toggle switch icon to the desired position. Once done, exit the settings and the changes will be applied.
Managing automatic uploads on Nintendo Switch 2 is a simple but powerful way to control your data, cloud storage and general gaming experience. Whether you prefer the system to automatically support your saved data and media or want to store bandwidth and storage by disabled, and adjusting this setting gives you the flexibility to choose what the best for you.
Read: How To Enable & Disable DSEE (Digital Sound Enhancement Engine) On Sony WH-1000XM6
