Dell laptops—Inspiron, XPS, Latitude and more—sometimes ship with default camera settings or outdated drivers that produce dim video. However, what if a dim video isn’t your issue?
Whether you’re jumping on a Zoom call, streaming, or simply taking a quick selfie, a dark or underexposed webcam can be incredibly frustrating.
Follow this comprehensive guide to diagnose and fix a webcam that is not working or showing a dark picture on your Dell laptop.
Read: How To Add Widgets To Lock Screen Of Samsung Galaxy A36/A56/A26
FIX Dark Picture On DELL Laptop WebCam
Sometimes, the most annoying problem, may be the simplest one to solve, as is the case in this instance.
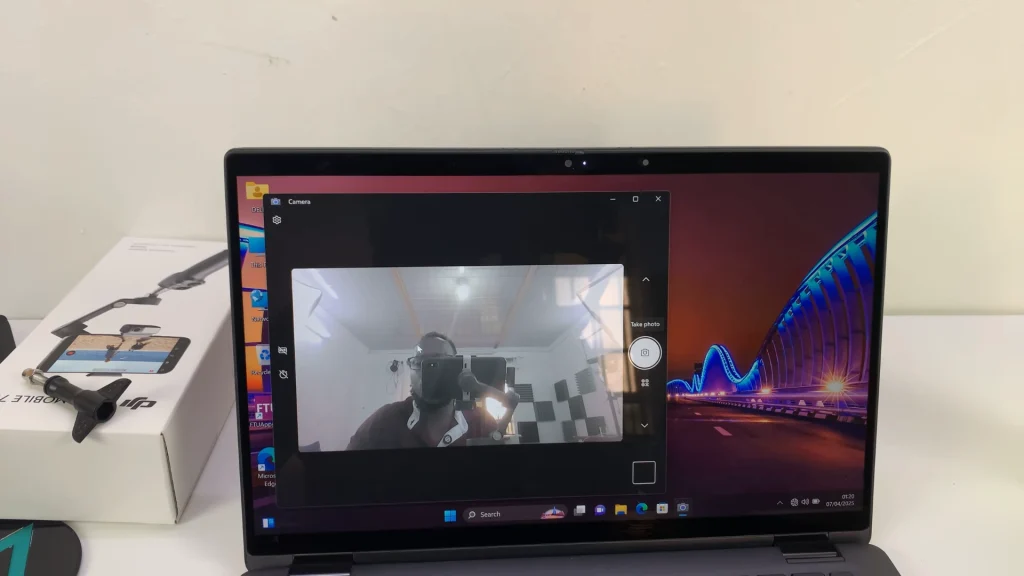
Newer DELL laptops come with a privacy shutter that you need to open, for the webcam to start working. This shutter is located right at the top of the screen, above the webcam itself. Ensure any privacy shutter or sticker isn’t partially or fully covering the lens.
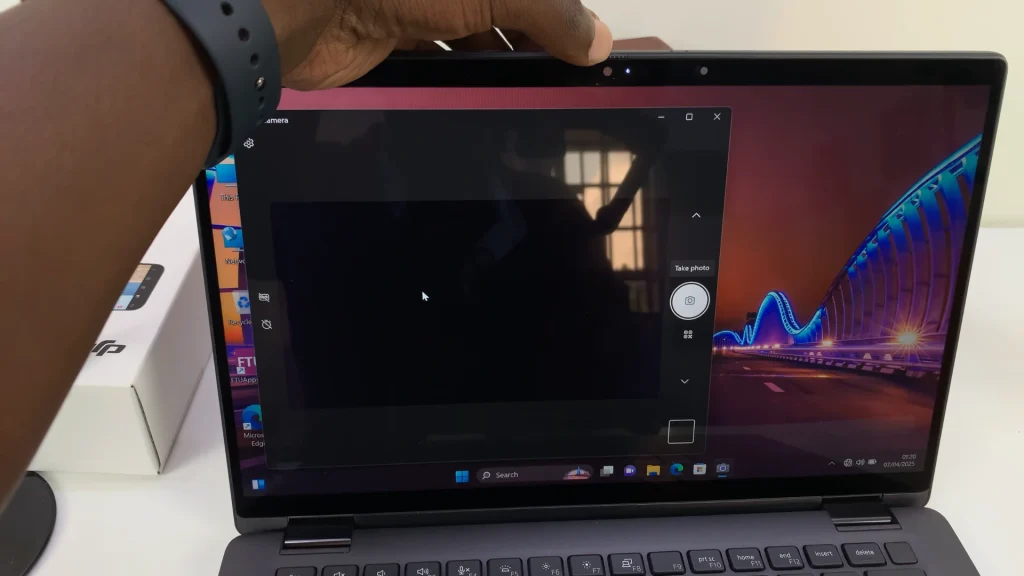
Once you do this, with everything else remaining constant or undisturbed, your webcam should start working normally, with a clear picture.
You can also proceed to do a few quality checks like the following:
Clean the Lens: Fingerprints, dust or debris can block light. Gently wipe the camera area with a microfiber cloth.
Optimize Ambient Lighting: Avoid backlighting; face a window or lamp. More light equals a brighter image.
More Solutions
It may just be that the above solution isn’t the only issue you’re experiencing. Other things you can explore are discussed briefly below.
Verify Privacy & App Permissions
Windows may block camera access globally or per‑app. Simply open Settings and select Privacy & security. Go to the Camera option and ensure Camera access is On.
Under Let apps access your camera, toggle on the apps you use (e.g. Zoom, Microsoft Teams).
Adjust Windows Camera Settings
Windows 10/11 offers basic brightness and contrast controls:
Launch the Camera app from the Start menu. Click the gear icon (Settings) at top‑right. Under Video Settings, slide Brightness, Contrast, and White balance until your image looks clear.
Tip: If sliders are grayed out, your driver may not support these controls—see Update/Reinstall Drivers below.
Update or Reinstall Webcam Drivers
Outdated or corrupt drivers often cause exposure issues:
To do this, press Win + X and select Device Manager. Expand Cameras (or Imaging devices). Here, right‑click your webcam (e.g. Integrated Webcam), choose Update driver and Search automatically or online.
If no update is found, choose Uninstall device and reboot. Windows will reinstall a fresh driver.
Use Dell’s Official Camera App
Some Dell models include Dell Peripheral Manager or a dedicated Camera Settings utility with enhanced controls.
Download or launch Dell Peripheral Manager from the Microsoft Store or Dell’s support site. Navigate to Camera and tweak exposure, brightness, and color settings directly.
Run Dell SupportAssist Diagnostics
Dell’s SupportAssist can detect hardware faults. Simply launch it, it’s preinstalled on most Dell laptops. Go to Troubleshooting and select Hardware Scan. Here, choose Custom and select Camera.
Follow on‑screen prompts to identify and resolve hardware issues.
Update BIOS & Chipset Drivers
In rare cases, system firmware affects peripheral performance. You can visit Dell’s support site and enter your laptop’s Service Tag. Download the latest BIOS and Chipset driver updates. Install both—reboot when prompted.
Test in Multiple Applications
After applying fixes, ensure consistency. Simply open the built‑in Camera app. Join a meeting in Zoom, Teams, or Skype. Try third‑party tools like OBS Studio to rule out app‑specific settings.
Advanced Tips for Better Image Quality
External Lighting: A ring light or LED panel can dramatically boost brightness.
Background Software: Close GPU‑intensive apps (games, video editors) that might throttle camera performance.
External Webcam: If all else fails and you need professional‑grade image quality, consider a USB webcam with built‑in auto‑exposure.


)