Going live on Instagram is a great way to connect with your audience, but planning ahead can make the experience even better. Whether you’re promoting a product, hosting a Q&A, or simply interacting with followers, scheduling your live session can help increase visibility and engagement. That’s why many creators and businesses are now searching for how to schedule an Instagram Live to make the most of their broadcasts.
Additionally, setting a live session in advance allows followers to get notified and prepare to join in. This not only boosts attendance but also adds professionalism to your content. As more users take advantage of this option, knowing how to schedule an Instagram Live has become essential for anyone looking to maximize their impact on the platform.
Watch:See People You’ve Blocked On Instagram
Schedule An Instagram Live
Swipe to the Post Section
Swipe across until you reach the screen with options like Story, Reel, and Live.

Select Live Mode
Tap on Live to begin setting up your Instagram Live session.
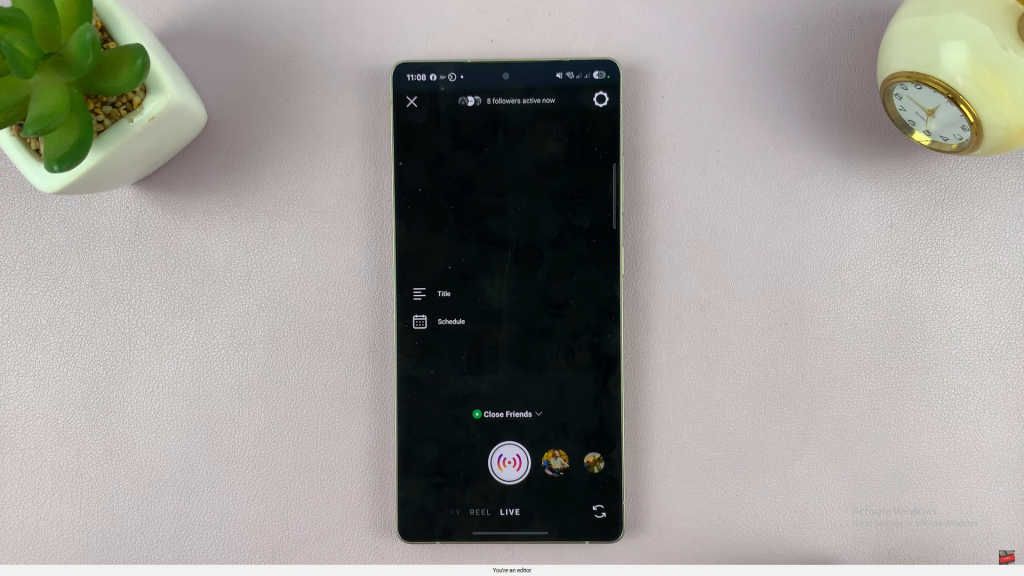
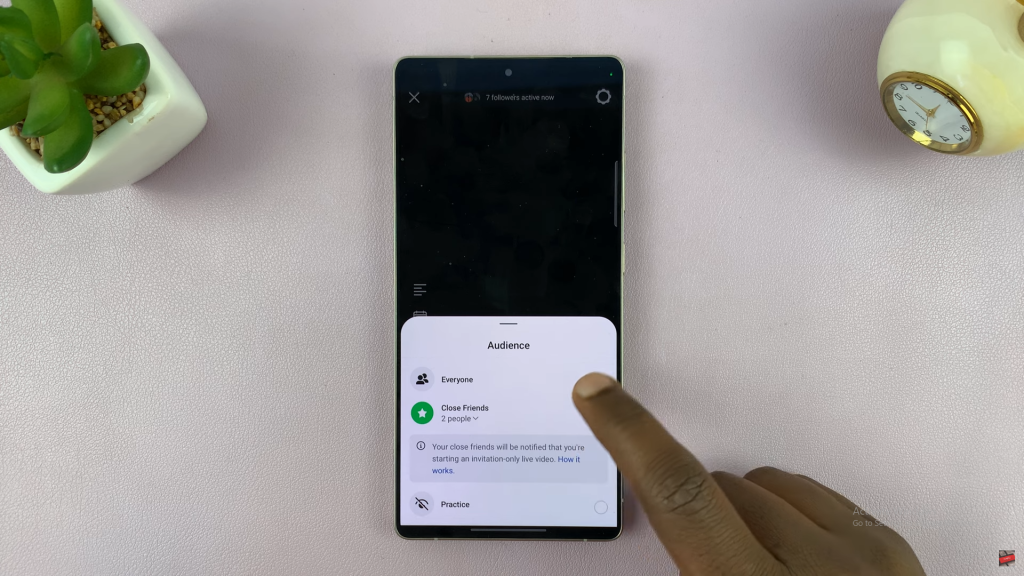
Set Audience & Title
Choose your audience (e.g., Everyone or Close Friends), then tap the title section and add a name for your live video.
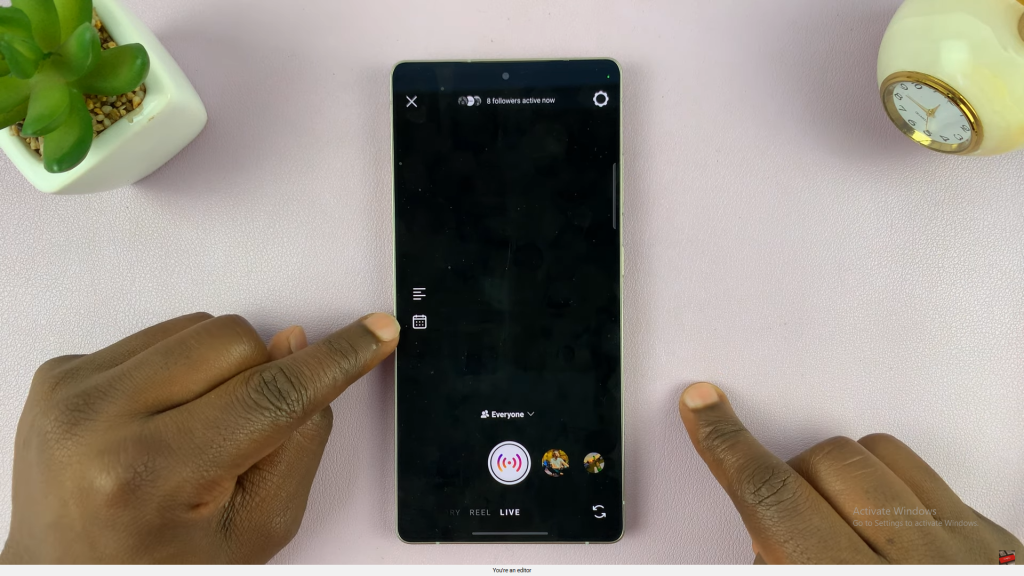
Tap the Calendar Icon
Tap the calendar icon to schedule your Instagram Live for a later time.
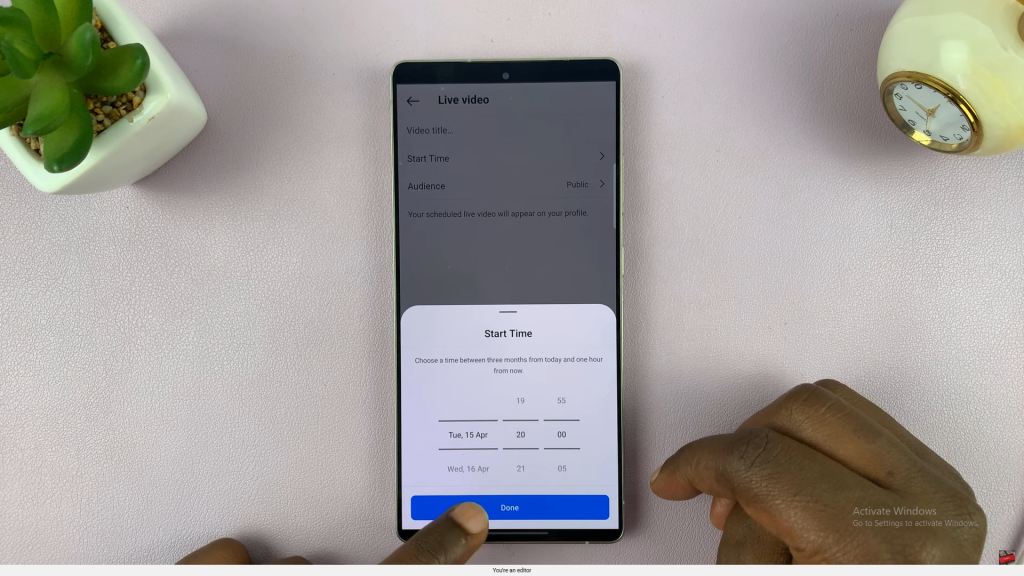
Set the Start Time
Pick the date and time you want your live to begin, then tap Done.
Add a Second Title (if prompted)
Instagram may ask for another title—go ahead and re-enter it if required.
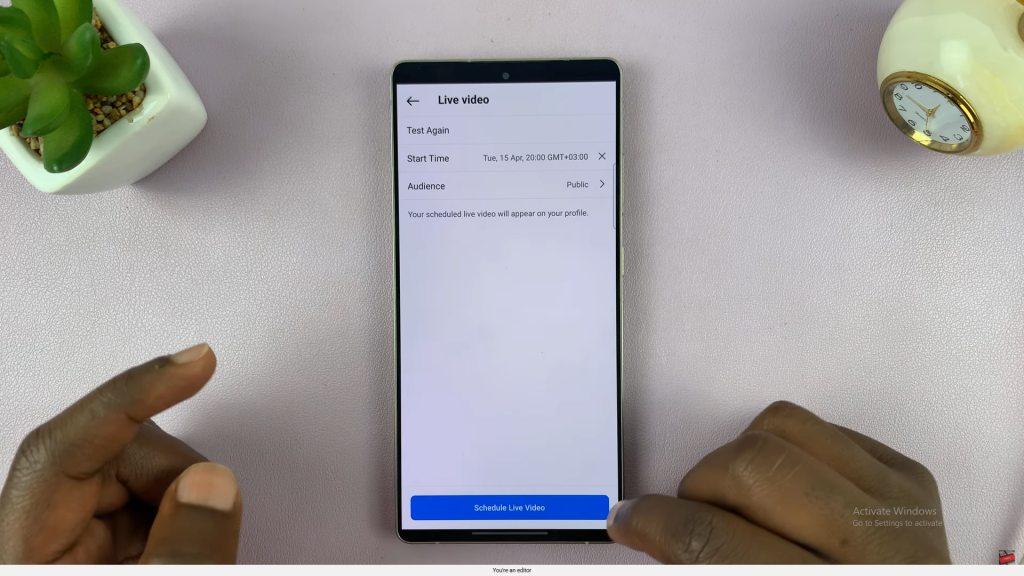
Schedule the Live Video
Tap on Schedule Live Video to finalize everything.
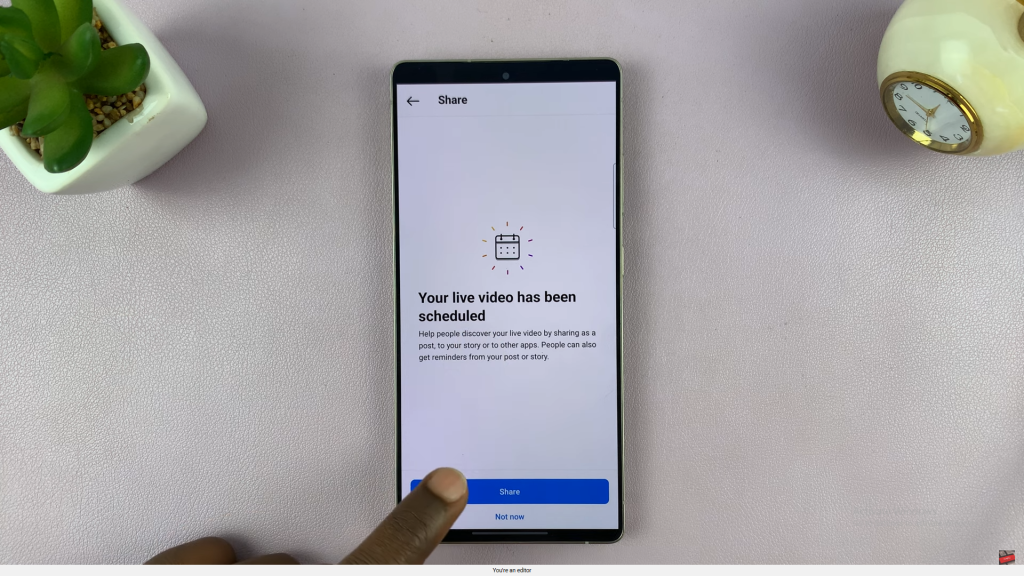
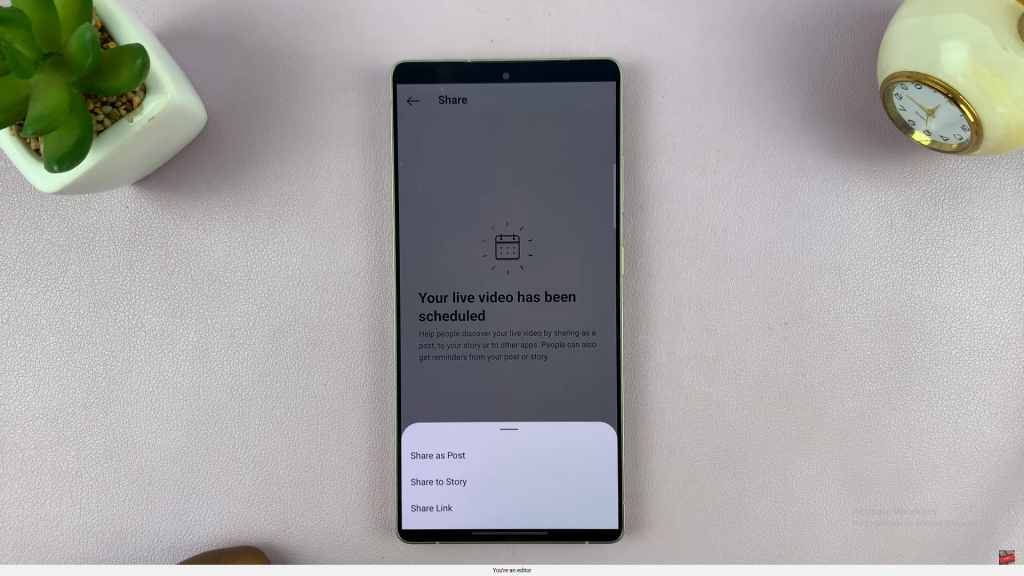
Share the Scheduled Live
Choose how to share it—as a post, story, or link. Sharing as a story helps your followers set reminders easily.
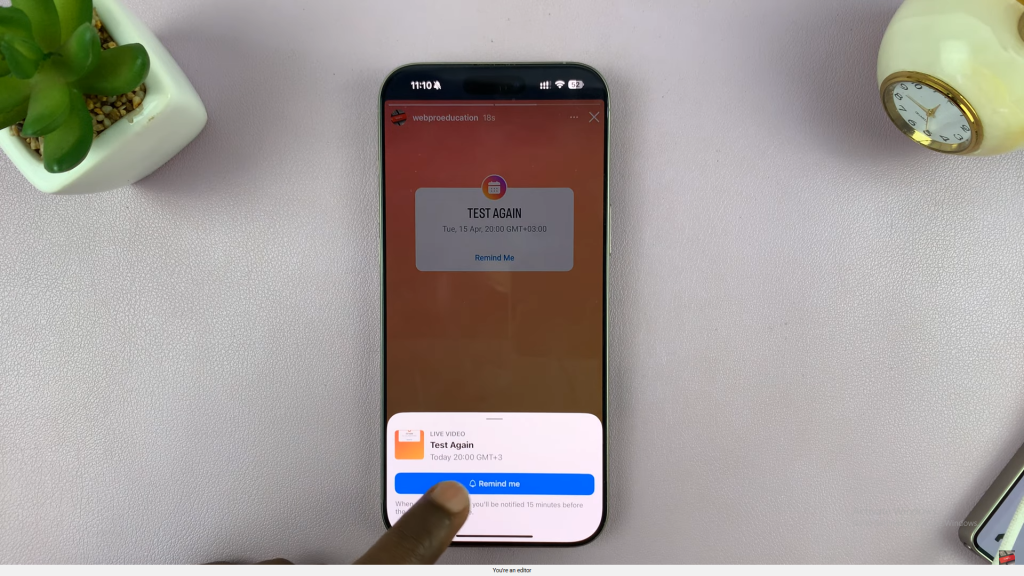
Enable Reminders
Your followers can tap Remind Me to get notified before you go live.
Read:How To See People You’ve Blocked On Instagram

