Keeping your Apple ID secure is essential, and one way to ensure your security is by managing your trusted devices. If you’ve logged into your Apple ID on multiple devices over time, it’s a good idea to periodically review and remove devices you no longer use or recognize.
This article will guide you through the process you can use to find and delete trusted devices on your iPhone.
Trusted devices are Apple devices that you’ve signed into with your Apple ID and that have been verified using two-factor authentication. These devices can receive verification codes when you sign in on new devices or browsers, making them a key part of your Apple account security.
Watch: Trust This Computer Pop Up Not Showing On iPhone
Find Trusted Devices
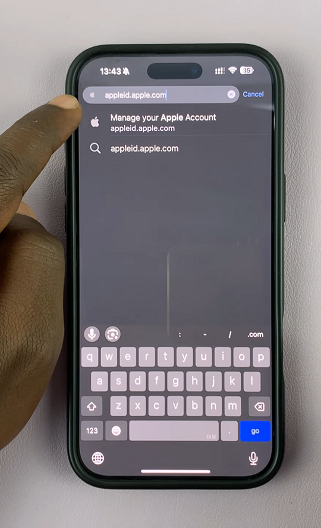
To find trusted devices on your iPhone, launch your favourite browser and go to appleid.apple.com. Once it loads, the URL should change to account.apple.com.
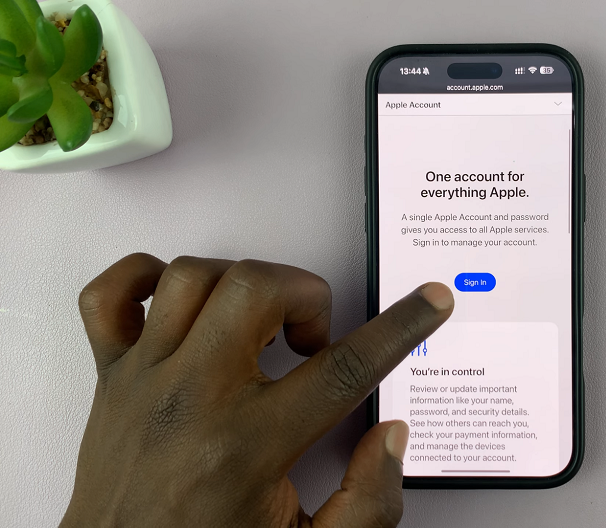
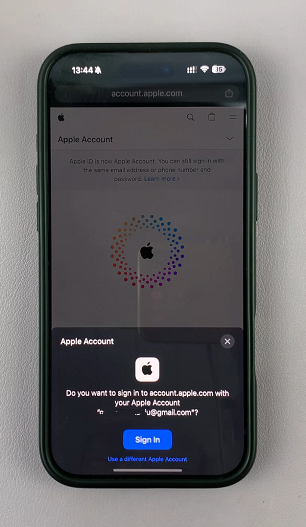
Scroll down a bit and tap on Sign In, then sign in with your Apple Account. Enter your Apple ID and password when prompted. Your Face ID will be scanned to verify that it’s you.
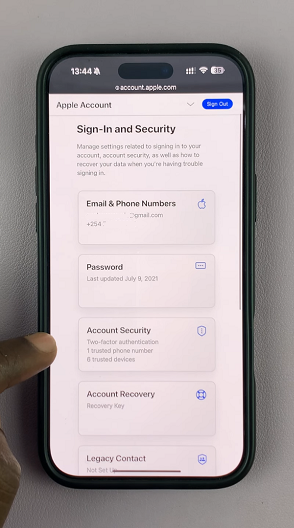
Under Sign-In and Security, tap on Account Security. Here, scroll down to see a list of all devices associated with your Apple ID. These include iPhones, iPads, MacBooks, Apple Watches, and even third-party devices signed into iCloud.
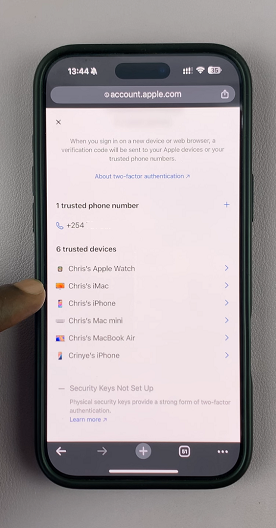
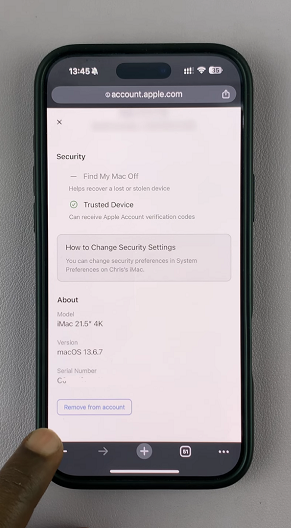
If you see a device that you no longer use, recognize, or wish to remove for security reasons, tap on the arrow next to it. You’ll be able to view details such as model, OS version, and trusted device status. This is where you’ll also be able to remove a device.
Delete Trusted Devices On iPhone
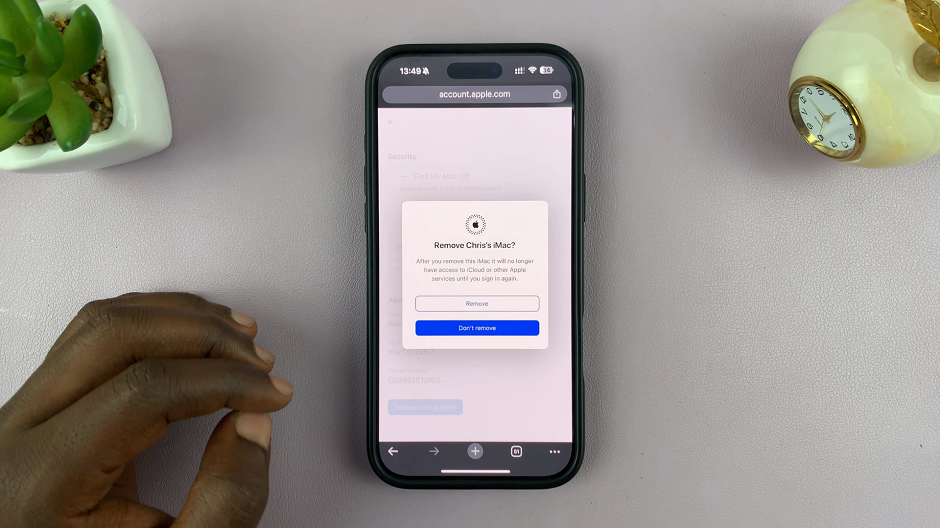
To remove a trusted device, scroll to the very bottom of that device’s details and select the Remove From Account. A confirmation pop-up will appear.
Tap Remove to finalize the process. Once removed, the device will no longer have access to your Apple ID, and it won’t receive verification codes. It will also be removed from the trusted devices list.
In the event that device tries to sign in again, it will require your Apple ID password and two-factor authentication.
Turn OFF Stolen Device Protection
If the confirmation pop-up doesn’t come up immediately, then it is likely that you have enabled Stolen Device Protection (iOS 17.3 or later). This is the message you may see instead.
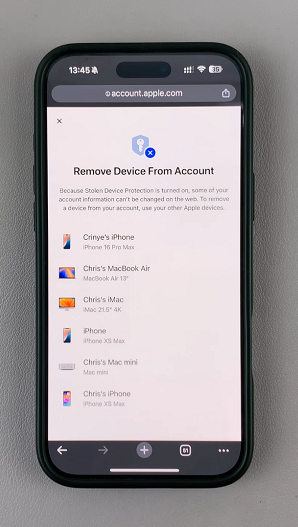
With this option enabled, you can’t change any of your information from the web. You may need to use your other trusted devices to facilitate the removal, or simply disable Stolen Device Protection.
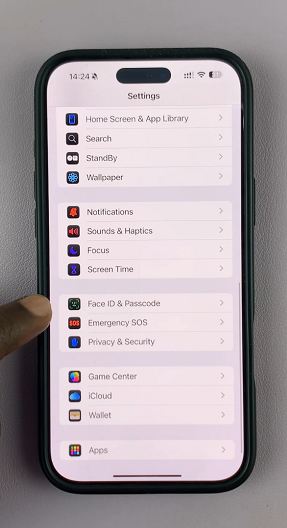
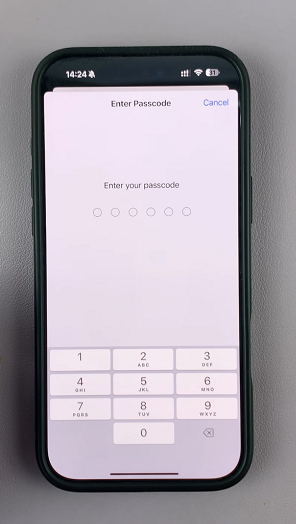
Under Settings and tap on Face ID & Passcode (or Touch ID & Passcode). You will be prompted to enter your device passcode. Enter it.
Enable Face ID or Touch ID, if it is not enabled. Stolen Device Protection requires biometric authentication. If you don’t see Stolen Device Protection, you may need to set up Face ID or Touch ID first.
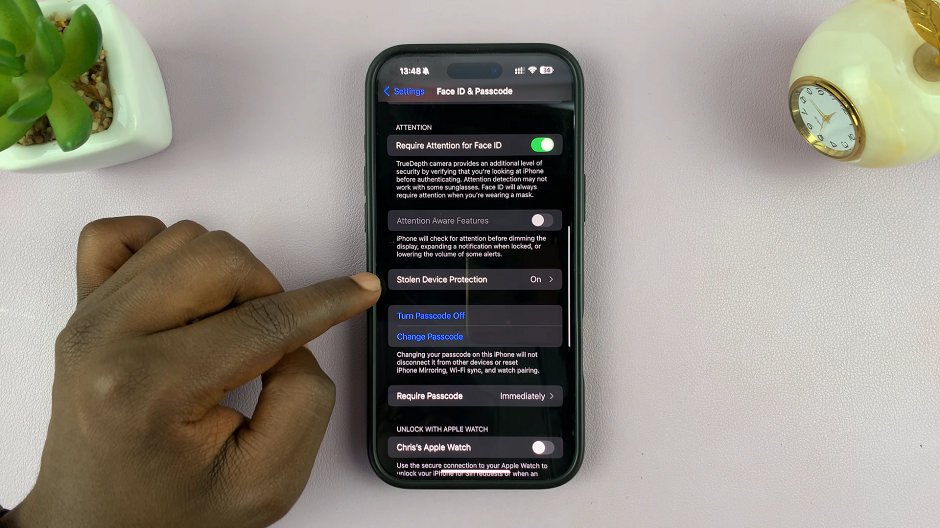
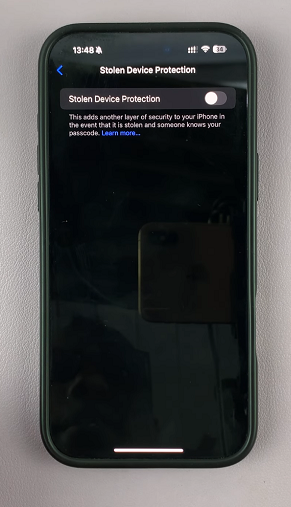
Scroll down and tap Stolen Device Protection. If it is turned ON, tap on it.
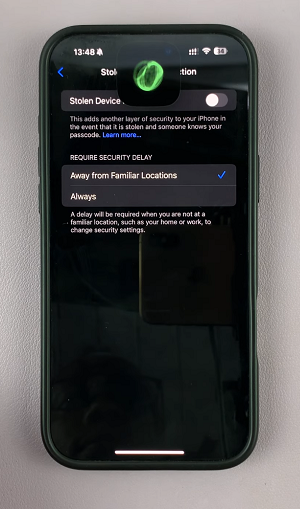
Then, tap on the Stolen Device Protection toggle to turn OFF. Your face will be scanned once again for verification before the disabling is confirmed.
Go back to the browser and refresh the page. Tap on Remove From Account once more and select Remove from the pop up to confirm.
Additional Security Tips
Change Your Apple ID Password: If you removed a device because you didn’t recognize it, consider changing your Apple ID password immediately.
Enable Two-Factor Authentication: If you haven’t already, make sure two-factor authentication is turned on for extra security.
Review Account Activity: Regularly check your Apple ID account for unfamiliar activity.
Read: How To FIX Trust This Computer Pop Up Not Showing On iPhone

