Custom line spacing in Google Docs lets you control the space between lines in your text. It helps improve readability and ensures your document meets formatting requirements. Whether you’re writing an essay, report, or creative piece, adjusting line spacing can make your content look cleaner and more professional.
Google Docs offers a built-in feature that allows you to set specific line spacing values. You can apply custom spacing to a paragraph, a section, or the entire document. This feature is especially useful when standard spacing options like single or double don’t fit your needs.
Applying custom line spacing in Google Docs is a simple but powerful way to enhance the appearance of your content. With just a few clicks, you can format your document to meet academic, professional, or personal standards. Whether you need more space for clarity or want to meet specific submission guidelines, custom spacing gives you full control.
Follow these simple steps to apply custom line spacing and format your text precisely for clean, professional documents:
Watch: How To Double space In Google Docs
Insert Custom Line Spacing In Google Docs.
Select the Text
Highlight the portion of text you want to format. To select the whole document, press ”Ctrl + A” or ”Cmd + A” on Mac.
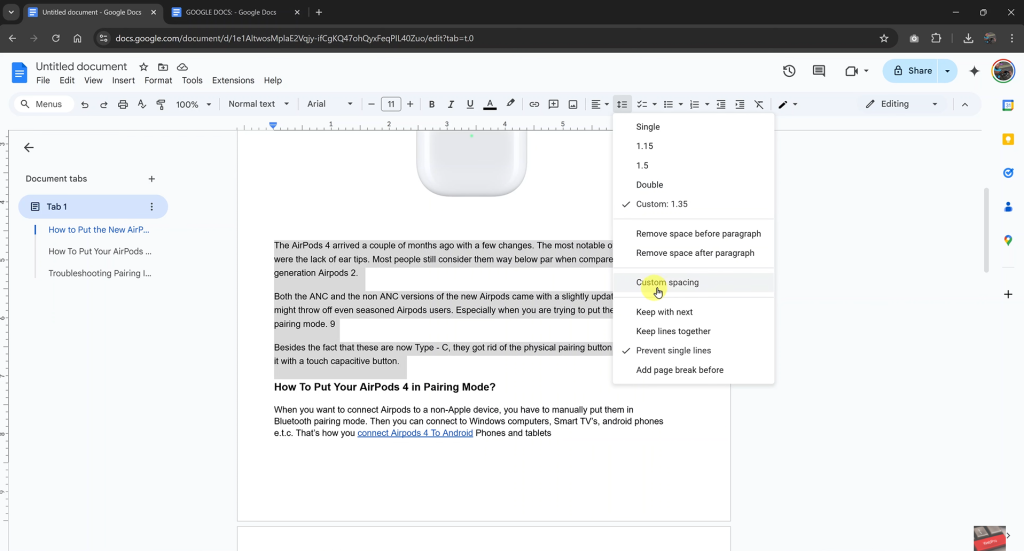
Open Line Spacing Options.
Click the “Line & Paragraph Spacing” icon on the toolbar.
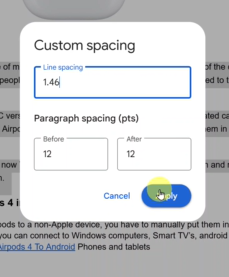
Choose “Custom Spacing”
From the dropdown, click ”Custom spacing” to open the spacing settings window.
Enter Your Values
Type your desired line spacing (e.g., 1.15, 1.75, or 2.5). You can also add spacing before or after paragraphs.
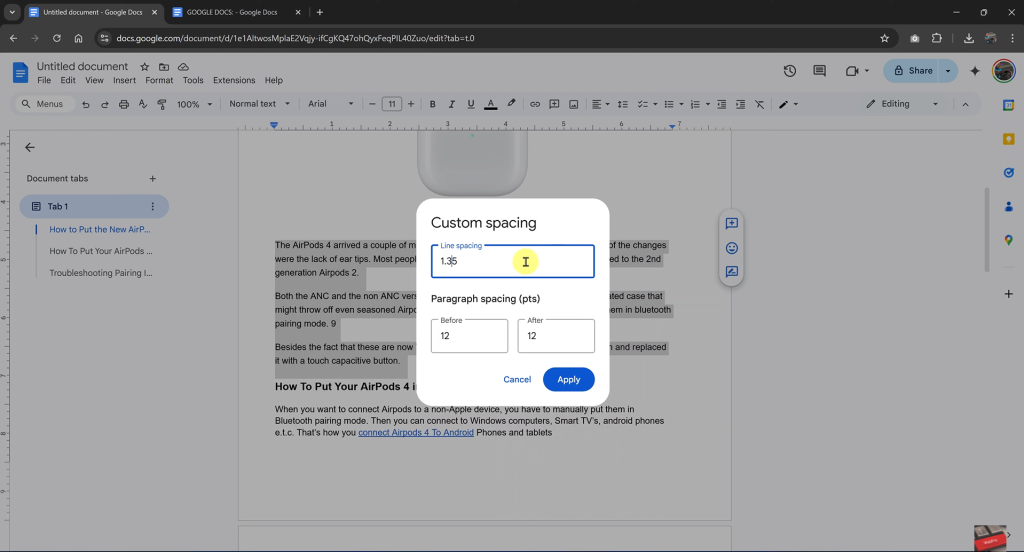
Click Apply
Once done, click ”Apply” to save your changes. Your custom spacing will now appear in the selected text.
Custom spacing gives you more flexibility when formatting. It helps you create a layout that fits your writing style or document guidelines with ease.

