In the current digital world, privacy means so much more than at any time before, and the easiest method of safeguarding your personal information is managing your messages. It includes clearing up old conversations, extracting sensitive data, or simply freeing up storage space on your Mac. Knowing how to delete messages permanently can protect your privacy.
Mac users often face an inability to delete messages once and for all; merely deleting them from within the Messages app does not imply that they will be entirely wiped out of your computer system. Often, people don’t realize their deleted messages may be recovered using backups or systems caches.
And that is the very point at which a need arises to delete messages irretrievably from your Mac-so that your texts, iMessages, and attachments are gone once and for all. This article brings you the stepwise process to permanently delete messages from a Mac.
Watch: How To Create Bluesky Account
Permanently Delete Messages On Mac
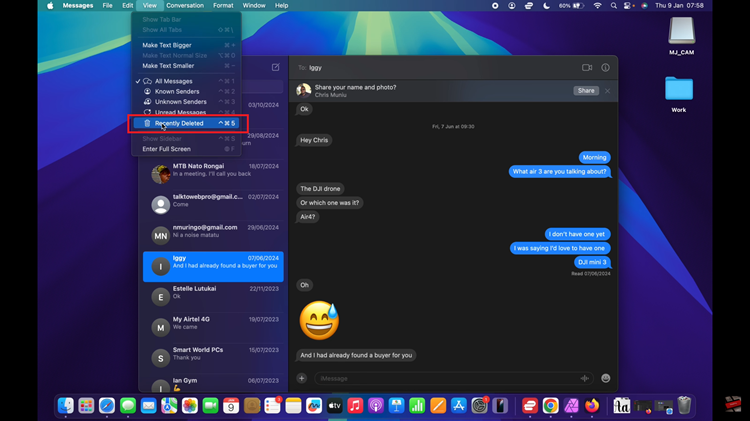
Begin by accessing the Messages app on your Mac. To do this, click on the Messages app icon located on the App Dock. Alternatively, you can use the Spotlight search feature. Then, click on ‘View‘ located on the menu bar and select ‘Recently Deleted’ option.
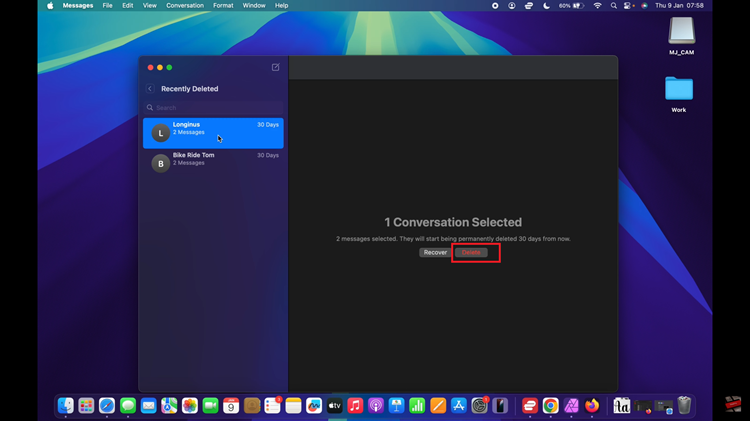
At this point, find the message or conversations that you’d like to delete and click on it. From here, click on ‘Delete‘ and confirm your process by clicking on ‘Delete Message(s).‘ Afterward, the messages will be removed from your device.
In conclusion, permanently deleting messages on your Mac is an essential step in safeguarding your privacy and keeping your device clean and organized. Follow the steps above to safeguard your privacy at all times.
 USB Devices From Galaxy S25")
